I had a discussion the other day about panorama photos and it made me want to see what would happen with the Photomerge command in Photoshop CS. I had taken a bunch of photos in Sydney with the hopes of being able to stick them together one day and make a large, highly defined picture. I used my Canon EOS 10d, which is a 6.3 megapixel digital SLR, and my 20-35mm wide-zoom at 20mm. I held the camera in my hand, which wasn't a horrible thing, since I didn't have my tripod. I tried it with four pictures. Here they are:
So right away we see a couple of problems. The first one is: I left the auto exposure on, and the 10d exposed each picture a little differently. Probably something with the white balance, too, since that's on automatic, as well. Note for future use, take a picture of a blank piece of white paper and set that as the custom white balance setting. Problem two: The polarized filter I have on my lens. I really should've taken that off. All part of the learning process. Probably another good idea would've been to turn off the autofocus, but that doesn't seem to have made a difference this time.
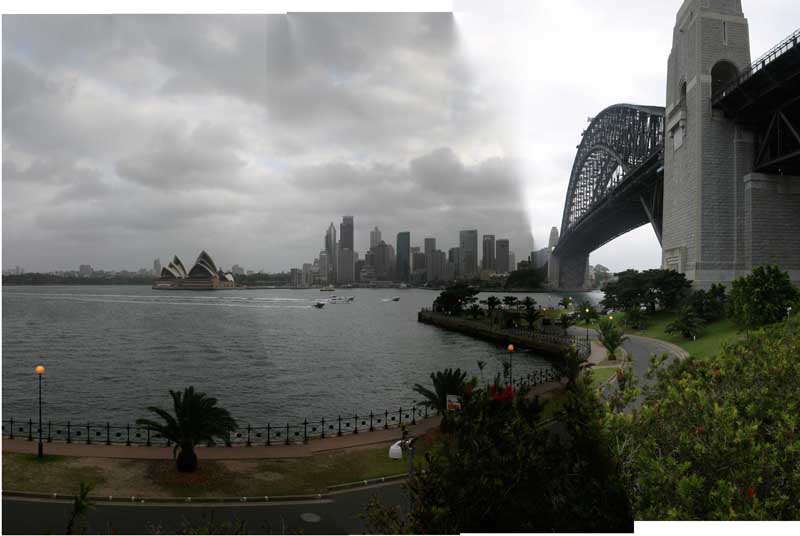
So then I ran the Photomerge command and here's what Photoshop gave me:

Interesting that it took the pictures and spliced them together at angles. Pretty good idea. That's why those programmers get the big bucks, I guess. The new photo is spliced together about as well as could be expected, considering. If you ignore the curb, the fence, and the sidewalk, the parallax is almost undetectable. It certainly highlights the flaws of the photographer and his auto-everything camera.

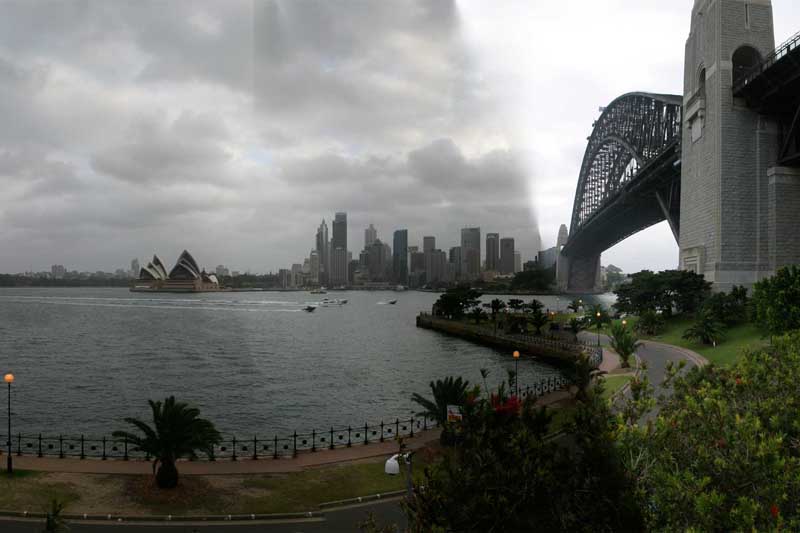
Crop, crop, crop, and now we have a picture which, if you ignore everything between the street and the water, as well as the contrast and all other flaws, looks pretty good. Especially since the software did everything.
Well. This looks like it was a fun adventure in discovering what all went wrong. Next time tripod, longer lens from farther away to compensate for parallax, remove the polarizing filter, and set the exposure manually. That's fine, but I guess that means I don't get to construct a decent picture out of this mess, since even though I know what I need to do, I'm on the other side of the planet from Sydney.
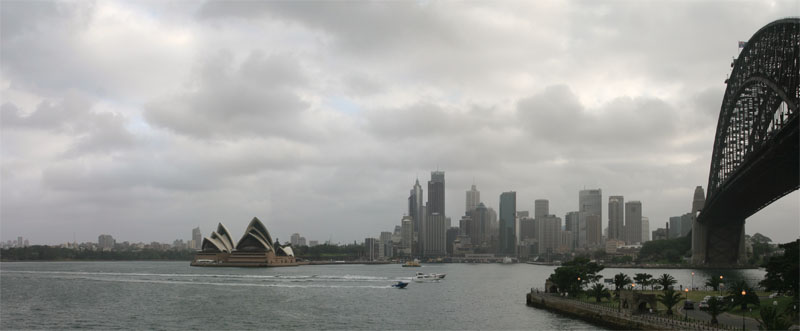
Undaunted by a lack of real photography experience, I decided to see what else I could do. First, dump the picture all the way on the right since the exposure is really just jacked on that one. Next, with the other three pictures being closer to each other in contrast, I was able to get some use out of the new Match Color command in Photoshop CS. This time when I ran Photomerge the contrast issues weren't so flagrant. There was still some banding but with the stamp tool, I took care of the worst parts in, oh, 15 seconds. There's a part that I missed and didn't notice until just now, but I'm trying to get this whole thing (learn the Photoshop commands, do the pictures, write up the html page) in under two hours. I'm not saying where it is, although it's probably pretty obvious. Crop, crop, crop and that distracting parallax crap at the bottom of the screen is gone.

And yeah. This is a better picture than that other one. It's not going to win any awards, but it's a bit more satisfying than tossing four photos. It looks like a picture that I could've taken in one shot, but obviously it's been reduced. The original of this cropped image is 3726x1540 pixels. My camera is 6.3 megapixels which is 3072x2048. So I got almost 700 pixels width over what I could've gotten with a single shot, assuming I wouldn't have needed to crop it. That's fine, considering the picture above is 800 wide. Too bad I couldn't use that fourth picture. Whatever. It's all just learning anyway!
For those of you keeping count at home, yes, I deleted a boat out of this picture and yes, the two boats towards the left are the same boat. I was shooting left to right.